"This is my invariable advice to people: Learn how to cook- try new recipes, learn from your mistakes, be fearless, and above all have fun!" - Julia Child
Saturday, July 31, 2010
pancetta & parmesan and prosciutto & provolone...
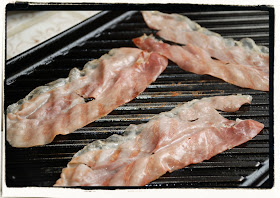
I decided to play with italian bacon (pancetta) and italian ham (prosciutto).
I decided on the Pioneer Woman's Pasta with Pancetta and Leeks and an easy chicken, prosciutto and provolone panini!
My hero-of-a-hubby asked for another panini! I'll take it that he liked it!
enjoy your time in the kitchen...
Monday, July 26, 2010
Bounty of tomatoes...
So, here's what my kitchen activity looked like this afternoon...
First, let's get the introductions out of the way. I'm pleased to introduce you to Tiny the Tomato! She's my new friend. Isn't she adorable?!
I secretly wish I could keep her around forever.
Isn't that how it goes?!
Instead, let's roast her and some of her friends... (I blame my dark sense of humor on being raised in the '80s...)
With a paring knife, I cored each tomato...
Then I cut them into rather large slices...
And diced them into rather large dices...
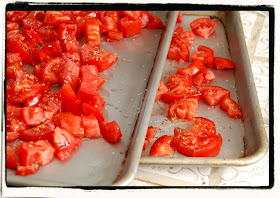
I layered them, single layer, on a large cookie sheet...
I gently sprinkled some dried italian seasoning and kosher salt... followed by a gentle drizzle of olive oil. I sent them into their glorious future with a smashed clove of garlic.
(Garlic makes everything better, right?!)
And while I'm at it, let's do two batches...
With the oven set at 225F degrees...
About an hour later...
I removed the tomatoes from the cookie sheets and divided them into two freezer bags, 2 cups per bag. Before placing them in the freezer I let them cool down a bit... then found a nice cozy corner of the freezer to securely hold them.
Next week sometime I'll use 2 cups of the best-roasted-tomatoes-my-kitchen-has-ever-seen in a pot of homemade spaghetti sauce... good times!
So, in memorium... let's have one last look at Tiny the Tomato.
enjoy your time in the kitchen...
Friday, July 23, 2010
Fresh, fresh, fresh...
Today I found a gift at our front door ... we had once again been blessed with some fresh, fresh produce!
I am deeply convinced that Neighbor Bob is the most dedicated vegetable gardener in all of Old Escondido! And lucky us! Several times during the summer he blesses us with some of the fruits of his labor.
I am also deeply convinced these came right up out of the soil. They were still gritty with the brown of the earth...
Freshly rinsed and drained...
And prepared for the next stage of their lives...
After a quick boil... and a sprinkle of kosher salt. They were then sprinkled with a little lemon juice and served up with my killer meatball sandwiches!
Would you like the recipe for the meatballs? I'm glad you asked! Check out a previous blog entry: Baked Meatballs
enjoy your time in the kitchen...
Sunday, July 18, 2010
Attempt #2 - Croque-Monsieur aka Croccante Signore
Lesson #1... there IS such a thing as "too much of a good thing"!
I used a little too much prosciutto (which made it too salty). I used a little to much provolone (which it made it just a little to rich.)
And I used a little too much bechamel sauce (which made it too soggy).
These are supposed to be crispy sandwiches... so, I'd say attempt #2 flopped.
I couldn't even eat the whole sandwich.
But the lessons were well worth it... I have a really good feeling about attempt #3!!! Stay tuned...
And yes, I think I'll be calling this my "Croccante Signore"... since I'm bent on using italian ingredients.
enjoy your time in the kitchen...
Saturday, July 17, 2010
pining for figs
I really wanted them to be the perfect figs.
They were "ok", just "alright"... but not what I was looking for exactly.
The inside of the figs are simply beautiful.
Bite right into them... and enjoy the mellow yet slight honey-like flavor.
If you don't know much about figs... read more here: About figs
Here's a challenge - next time you're at the market pick up a food item you're not sure about. Take it home, read up on it and do a taste test. Go ahead, be brave. Wait until you hear about my adventures in lychees.
Back to the figs: I remember once saying I didn't like figs. But in all reality I just didn't know enough to know what I was looking for. I didn't know at what stage of their ripening that they taste the best. It was just a matter of trying it and figuring it out. (Sidenote: Isn't that how life goes... we blindly judge something until we are open-minded enough to take the time to learn more about it and understand where it's coming from, the subject's strengths/weaknesses, how it's supposed to act, what it's capable of, etc.
Food imitating life... I love it!
Friday, July 16, 2010
my take on Croque-Monsieur... attempt #1
From what I understand it's the french take on a fancy grilled ham and cheese sandwich.
Make the sandwich, toast the buttered-bread in a pan, topped with bechamel sauce and placed under the broiler to crisp it up even more.
As you can see, my "Misters" got a little TOO crispy.
But dang!!!
This sandwich was fantastic!! I love the flakyness and crispness of the french bread. And that bechamel... out of this world!
I could get used to this!!!
I'm going to make another attempt at it tomorrow. But I promise not to burn them this time. I'll keep you posted w/ the outcome.
However, I stopped dead in my tracks when I realized this was starting to look more like an italian sandwiches with the provolone and the prosciutto! So it can't technically be a croque-monsieur. So translating "crispy mister" into italian finds me at the title of "Croccante Signore"... hmm, I like the sound of that!
enjoy your time in the kitchen...
Drink Recipe: Heatwave Lemonade...
Heatwave Lemonade
mix courtesy Lori Tisdale
1 part Lemoncello
2 parts freshly squeezed lemonade
1 part X-rated liqueur
Serve over ice or shake with ice and serve as a martini...
Whatever you do, stay in the shade and sit still for a while.
Thursday, July 15, 2010
Carnitas tacos and Not-Your-Average-Corn dish...
We're having a heat wave this week (and probably for the next 4 months). So, it was another quick taco night.
I bought already-cooked carnitas. (Yes, I'm cheating again! Or, I'm one smart-cookie! I guess it depends on how you look at it!) So I made some quick tacos. Corn tortillas enveloped the carnitas, sauteed vegetables (orange bell pepper and red onion), a drizzle of salsa, cilantro, green onions and cotija cheese.
We had some leftover black beans from two nights ago and I have been craving my favorite spicy, creamy corn dish.
So, let me show you what it looks like!
Here's what you need: steamed corn, diced serrano (or jalapeno), cream cheese, butter and kosher salt.
Start with hot corn and very finely diced serrano pepper... if you don't like a lot of pepper heat then remove the seeds/ribs from inside the serrano. I usually take out about half of the seeds and ribs. (I'm a wimp!)
Melt the softened cream cheese and butter in the microwave real briefly and mix well until creamed together...
Pour it over the corn and serrano pepper... and mix well.
Salt to taste... at times i've also added a dash of cayenne pepper for some color and another layer of heat. Oh yum!
Serve it up with your favorite dinner... and make extra! 'Cuz you're going to want it again the next night!
Not-Your-Average Corn
Recipe courtesy Lori Tisdale
Ingredients
4 cups of cooked corn
½ stick butter
½ package of cream cheese, softened
1 serrano pepper, diced
Salt/pepper to taste
Instructions
Melt butter and cream cheese in small sauce pan, on low until completely melted, combined. Add corn and jalapeno – mix well before serving.
enjoy your time in the kitchen...
Tuesday, July 13, 2010
Quick Bolognese and another panini...
I found a recipe on the back of the package for Trader Joe's pappardelle (egg noodle). So I tried it.
This is what it looks like.
But you can't tell by looking at the picture how it tasted.
So, let me ask my hero-of-a-hubby what he thought.
He thought that he wanted to lick the plate clean. And that he did...
I'd say that was pretty scrumptious.
And the panini? It's very simply italiano pane bread (soft, soft, soft bread) with provolone slices inside. I drizzled a little bit of olive oil on the outisde of the bread... and squished it between the panini grill and the panini press. And when I pulled the sandwich off the grill I rubbed it with a large garlic clove... just to leave a hint of garlic on the crispy bread.
My hubby also wanted another sandwich...
I'd say this dish will definitely reappear on our table at some point in the future...
enjoy your time in the kitchen...
Monday, July 12, 2010
Easy Shrimp Fajitas...
Confession: Last night I cheated a bit to make it even easier and quicker. (I do NOT like spending time in the kitchen when it's hot outside!) So, I stopped by my favorite authentic mexican restaurant on the way home from work (Casa de Bandini) and bought part of dinner. I got a pint each of their amazing black beans and their even more surprising arroz amarillo.
And all I did was make shrimp fajitas:
I slightly crushed 4 cloves of garlic and threw them into 1/4 cup of olive oil.
(Crushing opens the clove enough to extract flavor when heat is added.)
I set the stove to medium-low heat and let the garlic and oil 'get friendly'.
They hung out together while I prepared the shrimp, sliced up the veggies, etc.
(They hung out like this for about 10 minutes, just barely sizzling in hot oil.)
I sliced red/orange bell peppers and a red onion.
I then removed the garlic-infused oil from the pan, leaving just a tiny bit behind for the veggies.
The veggies went into the pan and sauteed until they just started to brown.
(Over medium-high heat, they hung out for about 10 minutes.)
(I tossed them several times to make sure they browned on all sides.)
Once soft enough, I removed the veggies to a bowl and set them aside.
This next part goes quickly...
The garlic-infused oil went back into the pan (without the garlic cloves).
I lightly salted the shrimp and added it the oil.
Approximately 30 seconds later, I turned the shrimp over.
I added the veggies back to the pan, waited about 30 seconds and tossed a few times before serving up.
These went perfect with corn tortillas that I warmed ever so slightly on the cast iron tortilla warmer.
Garnish with freshly chopped cilantro and cotija cheese...
You WANT to make these. I promise.
Sidenote: let it be known, it is my goal this summer to figure out how to make the special arroz amarillo that Casa de Bandini rocks! I may have to go back time and again for more test tastes. Oh darn...
enjoy your time in the kitchen...
Saturday, July 10, 2010
Grilled Chicken, prosciutto and provolone panini!
I've been in the panini mood lately...
Which means: I'm missing Geneva, Switzerland.
I lived/worked in downtown Geneva for several months in 1999... and quite often I could be found ordering a ham and swiss panini for lunch, from a street vendor. The paninis were made fresh while I waited ... so I would watch the happenings in the park.
And as far as I'm concerned... it was the best lunch in town. (But don't let this secret get out to any of the high-paid chefs in town!) It was hot. It could be wrapped in paper. I could walk down to the shore of Lac Leman while I was eating.
Feeilng nostalgic lately ... I broke out the cast iron panini grill and press.
Simple ingredients... sliced/buttered bread, fileted chicken breast, prosciutto, provolone and tomato. I fileted the chicken breast before cooking it. Cooks faster. Cooks evenly. Makes for a great panini.
So here's what took place next...
Starting with some crisped up prosciutto... it's salty. It's thin. It's oh-so-good!!!
On a grill pan or in a saute pan. It will only take about 45 seconds on each side... and then it's crisp. Set it aside and it's time to move on to the chicken.
Kosher salt on the chicken...
Chicken on the indoor grill pan...
And a-flip!
Once the chicken is done, the paninis can be built. Time to move from the grill pan to the cast-iron panini grill.
Buttered side of the bread face down on the grill.... add the cheese...
Then the next ingredients... in this case, tomatoes followed by prosciutto.
Keep layering... chicken and the "top" of the sandwich.
Place the panini press on top and push it down with the handle on top. You DO want to squish the sandwich. So, go ahead... squish!
After about 1 1/2 - 2 minutes, flip the sandwich over.
And again... squish!
Another 1 1/2 - 2 minutes and it should be ready.
This is my favorite part. When you turn the sandwich over you will see the cheesy crust created by your squishing. And it is oh so good...
Cut it in half and share it only with the ones you love...
enjoy your time in the kitchen...