Saturday, July 2, 2011

RECIPE: An easy stir fry...


Looking for some more easy summer dishes? Here's one that I think will be enjoyed quite often this summer! That's because with stir fry the veggies are cooked at a super high heat, which cooks them very fast! Other than prep time you're hardly spending any time actually "cooking".

And I know you know that I love my short cuts... taking a short cut here we bought a frozen package of stir fry vegetables (from Trader Joe's, but most groceries should have this). It's chocked full of pea pods, bean sprouts, bamboo shoots, soybeans, water chestnuts, carrots and mushrooms. And then to that we added fresh broccoli. (Whick veggies do YOU use for a stir fry?)


Next we move on to making our stir fry sauce... it's a combination of soy sauce, chicken stock, rice vinegar, red pepper flakes, corn starch and dark sesame oil (not pictured here). Oh, how forgetful am I?! I forgot to buy more when doing this post... so instead I used a touch of canola oil - and of course it didn't quite taste the same. But it worked out alright... next time, there's always next time.


The ingredients were whisked together in a little bowl and the corn starch added.


Here's an interesting fact about corn starch - it thickens when it gets hot. So be prepared for the corn starch to settle at the bottom of the cute little bowl... you can whisk it up again real quick before adding it to the heat.


And we're ready to stir fry... since stir fry is a quick process I've gotten in the habit of lining up all the players so they are ready for use: frozen stir fry vegetable mix, broccoli bites, and our "house chicken" (sliced/cooked - which we'll cover in another blog post)...


Heat the oil up, over medium-high to high heat... and add those veggies. (Please note - after eating this dish I wish I would have cooked the broccoli a little more. So, the recipe below is written to let the broccoli cook for a few minutes by themselves before adding the frozen veggies.)


Isn't that beautiful?! Yes, the pan will sizzle when the veggies are added... that's the sound you're looking for! You want it to be hot, hot, hot... (kind of like it is right now, outside... UNLIKE how it is as I sit inside typing away in my air conditioned house! Ahhh.... )

Keep moving the veggies around the pan, stirring/tossing frequently. They will cook for about 6-8 minutes total...


And then the sauce and the chicken is added... remember, as the sauce heats up it thickens up. It will also soak into the veggies and chicken... and it's oh so yummy!!!


Stir it around... and when the chicken has heated through it's ready to serve up!


We enjoy ours with brown rice, a touch more soy sauce and a sprinkle of sesame seeds to top it off.


Chicken and Vegetable Stir Fry
Recipe courtesy Lori Tisdale

Ingredients
¼ cup chicken broth
2 tablespoons rice vinegar
2 tablespoons soy sauce
2 teaspoons cornstarch
½ teaspoon dark sesame oil
1/8 teaspoon crushed red pepper (or more, to taste)
1 tablespoon canola oil
2 cups fresh broccoli, cut into small bite-size pieces (by volume)
8 ounces frozen vegetable stir fry mix (by weight)
1 tablespoon minced garlic
2 boneless, skinless chicken breasts (about 10 oz, cooked and sliced)

Instructions
In a small bowl whisk together chicken broth, rice vinegar, soy sauce, corn starch, sesame oil and crushed red pepper. Set aside.

Add 1 tablespoon canola oil to hot sauté pan (or wok) over high heat. Add broccoli, sauté for about 2-3 minutes; tossing pan regularly to coat and evenly cook broccoli. Add the vegetable stir fry mix and continue to saute for another 5-6 minutes. (If using fresh vegetables reduce cooking time appropriately.)

Stir broth mixture one more time to make sure corn starch is completely mixed in and add to pan. Simmer for about 30 seconds; add chicken. Reduce heat and stir until chicken is warmed through

Serve with brown rice, a touch more soy sauce and a sprinkle of sesame seeds on top.


enjoy your time in the kitchen...

Sunday, June 26, 2011

RECIPE: Bruschetta Soup


I love making pantry soups... and this one is super healthy! I bet you could walk to your pantry and make a similar soup.

But I have a flavor bursting tip... in a ridiculous moment of genius (I have one every decade or so) I used Trader Joe's bottled Bruschetta topping. Bruschetta (an italian/tomato-based topping for bread or lavash) consists of tomatoes, basil and garlic, as well as a little olive oil and salt. By using this jar I discovered the bruschetta topping was so packed full of flavor that I didn't need to use any additional dried herbs.


So, here's where I started...


Chicken broth, chicken, jar of bruschetta topping, carrot, celery, onion and corn (and the garlic and pasta is not pictured).


And for the close up of the star of the show...


And then it's time for the veg...


Diced onions...


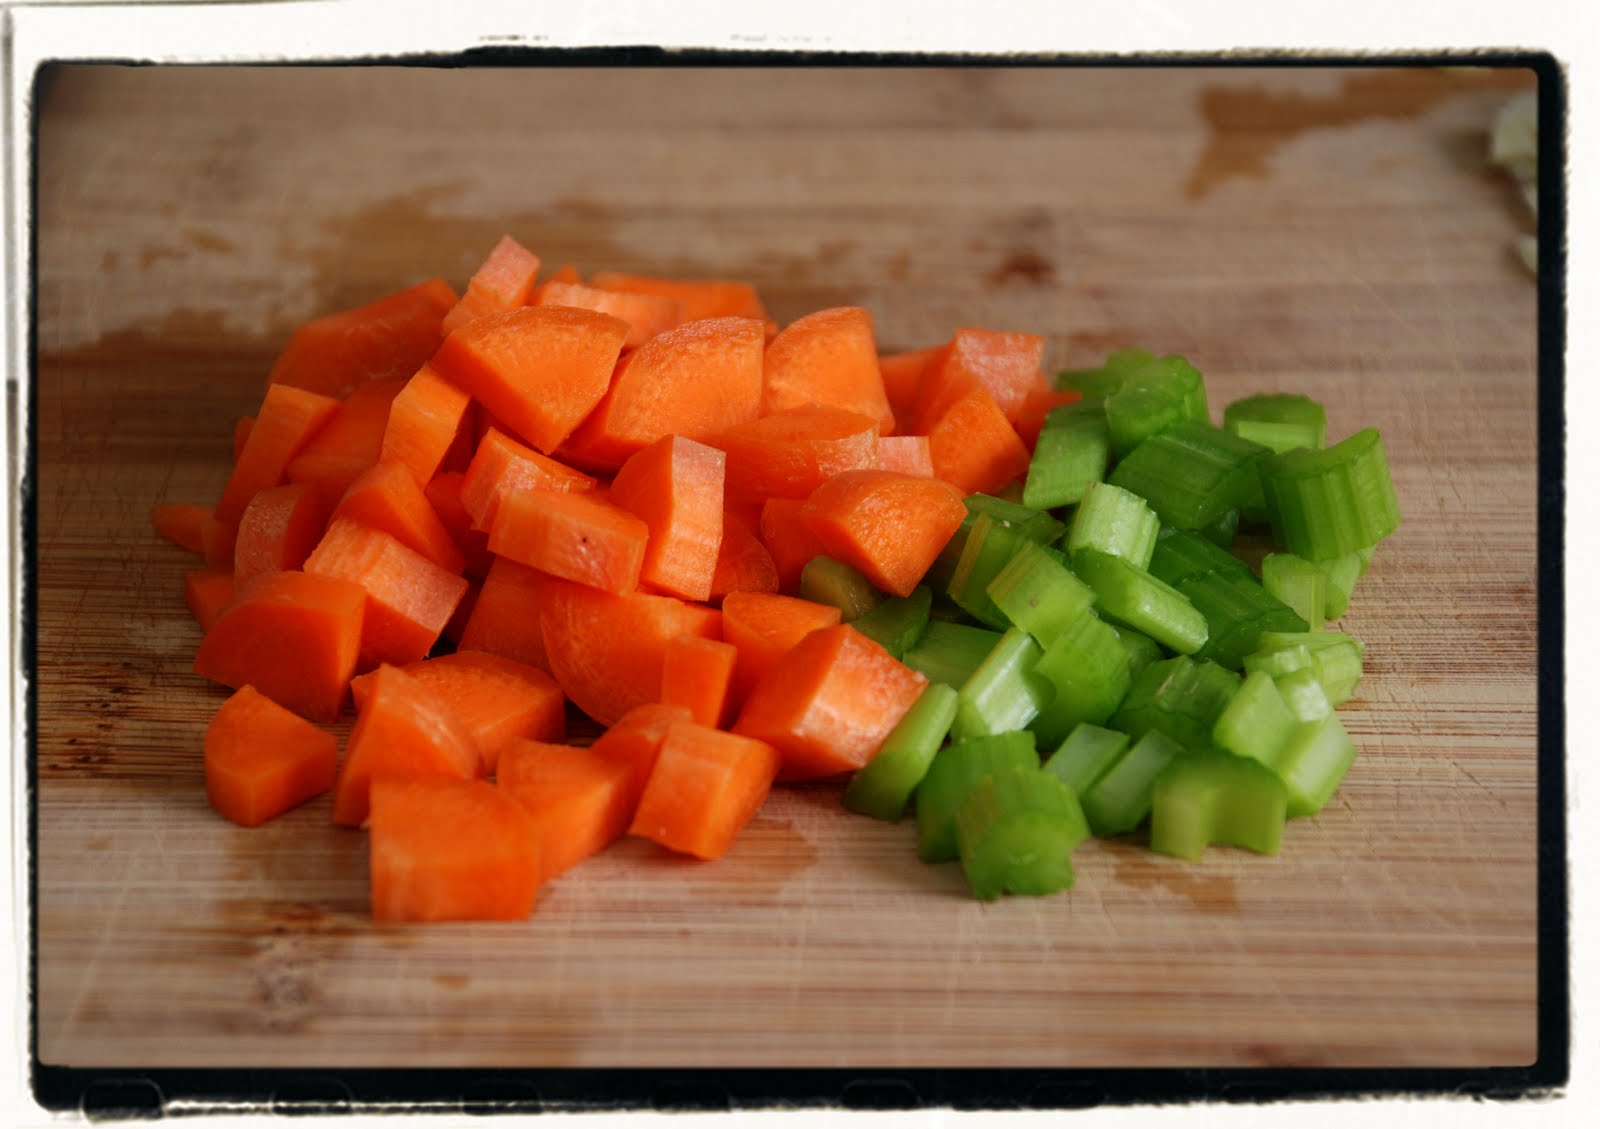
Diced carrots and celery...


Saute until they are, well... sauteed.


In the last few minutes add the garlic, sauteeing until it is soft. It is at this point that the whole house starts to smell like dinner time... I blame it on the garlic.


Add the bruschetta mixture and the chicken broth, give it a stir and bring it to a boil...


The beauty of soups is that you can often take some very simple flavors... and when you add heat to them and allow them to hang out for a long time they create a flavor all their own. (Kind of like ol' friends!)


Don't forget to add the shredded chicken and the corn... cover and allow all of this to sit on the stove top, over low to medium-low heat, for at least 20-30 minutes.

And then about 10 minutes before you are ready to have dinner increase the heat to medium-high and add the pasta, and bring to a boil. Once the pasta is done you can dish it up!


This would be great with a panini... or all by itself is just fine too! Enjoy...


Bruschetta Soup
Recipe courtesy Lori Tisdale

Ingredients
1 whole rotisserie chicken, shredded
1 jar Trader Joe’s bruschetta topping
1 tablespoon olive oil
1 carrot, diced
1 stalk celery, diced
1 small red onion, diced
2-3 cloves garlic, diced
1 cup frozen corn, uncooked
2 quarts chicken broth
1 cup pasta (medium shells or macaroni)
Kosher salt/pepper

Instructions
Heat oil in a stock pot over medium heat. Once the oil is hot add onions, carrots and celery. Sauté veg until slightly softened, 3-5 minutes. Add pinch of salt and garlic, sauté for another 2 minutes or so.

Add bruschetta topping, chicken stock and corn. Bring to a boil. Reduce heat to medium-low, cover and allow to simmer for at least 30 minutes. About 10 minutes before ready to eat, raise heat to medium-high and add pasta. Cook until al dente. Taste for flavor. Add kosher salt/pepper is desired.


enjoy your time in the kitchen...

Saturday, June 25, 2011

Cooking Class at Cafe Merlot

At the end of May our team at work did a cooking class, as a team building. We had a blast... what a treat! Lots of laughter, lots of food and lots of learning!

Our class started off with an introduction and some background from Toni Kraft, one of the proud new owners of Cafe Merlot at Bernardo Winery, the oldest continuously operating winery in Southern California. Bernardo Winery is hidden in the hills of North San Diego County (in Rancho Bernardo, as a matter of fact)... a quaint family run winery boasting jazz on Sunday afternoons, a large courtyard to stroll through, a coffee shop, restaurant, a farmers market on Fridays, shops & artist studios and a beautiful lawn leading out to some of the vineyards.

Please, if you do anything this summer... make sure to visit Bernardo Winery. (But don't tell anyone else - we want to keep it "hidden"!) ; )


We had some appetizers...


And then Toni handed us off to Chef Daniel Reynolds, who schooled us! (In a good way...)


Let's see... what did we learn/make?

- We made bruschetta (and he explained that if we were pronouncing this word "BROOSHEDDA" then we would be laughed at). Note to self: It's "BROOSKET-TA!"
- We made a citrus viniagrette
- We made his Universal Marinade (did I write down all of those ingredients?! phew!)
- He showed us how to make his famed omelets, as well as how to FLIP an omelet! (I failed!)


Through all of those cooking lessons Chef Daniel shared with us some of his kitchen tips (like why it's important to "spank the herbs"), a few chef secrets, the importance of LABELING everything in the kitchen/refrigerator (product, date, etc), tips on the proper julienne cut and explained the dice, aka "brunoise".


After each lesson we'd get to taste test what we had made, of course...


And by the end of the day we were so full we had to sit down...


And once we sat down they brought to us one of the most amazing mimosas I've ever had in my life. I'm telling you - they serve a special mimosa that you'll have to try for yourself... using a unique-to-them champagne (that's apparently rather difficult to acquire), blood orange juice and I believe there was a third ingredient (which I can't seem to recall at the moment).


What a great day... we learned a lot, we ate some amazing food (THAT WE MADE OURSELVES) and have I said yet how much we laughed ?! Oh yeah, and one more thing we took away from the day? "Don't pull a Lori!" (obviously referring to how I failed on the one-handed flip of the omelet...nice!)


enjoy your time in the kitchen...

Friday, June 24, 2011

Final steps for homemade Limoncello

Yes, we finally have limoncello! (And also grapefruit liqueur...don't forget about that one!)

If you have time, check out my previous post for Steps 2 and 3 (also within that post is the link to Step 1): Steps 2 and 3 to homemade limoncello


And nooowww (drumroll please) we are ready to unveil the goodness that is this my pride and joy this summer...


Bottle on the left is the grapefruit liqueur
Bottle on the right is the limoncello


Here are the steps I took to finalize this long, long process...

- I strained the liquid one last time
- I found appropriately sized bottles for storing the liqueur
- I placed the bottles in the freezer
- Approximately 3 hours later I got them out of the freezer and poured a shot of each. Yes, a shot of each...

(The only other thing I need to do is create a label for the bottles... still working on a snazzy name brand. "Lori's Limoncello"? Seems to fall flat... any other ideas out there?)


But back to the tasting... I was pleasantly surprised at how smooth and fresh and sweet and PERFECT they were! (In fact I could barely tell the difference between the homemade and the store bought version I've been sipping on for the past several years!) All by themselves they are great to sip on... but I've also discovered that I LOVE the limoncello this way: Heatwave Lemonade

And I'm working on a grapefruit martini (well, not at this exact moment... after all, it's not even 5:30 am... you know what I mean!) Stay tuned for more on that beverage...


enjoy your time in the kitchen...

Recipe: Lite Tex Mex Salad


As my hero-of-a-hubby and I embark on an "eating-fresher-and-getting-healthier-in-the-process" adventure we're finding all sorts of new food combinations, cooking methods, tasty tricks, etc... and this salad was one of the first things we discovered. It will be a staple for us through the summer...

Here's the recipe we started with... it was originally in Eating Well magazine, but most recently featured on Cooking.com. As you'll notice, the recipe doesn't include the fried tortilla... we just crumbled up a few tortilla chips on top of the salad for some extra crunch. The meat has so much flavor... so, so much flavor! What a great salad...

Tex-Mex Taco Salad

We decided to use ground turkey (obviously a leaner meat which also contains more protein by ounce and isn't as high in cholesterol as ground beef)... and then we changed up the dressing to a lighter yogurt version.

The original Southwest Dressing post... Southwest Dressing


But NOW we are replacing the Ranch dressing with Fage greek yogurt. This reduces the calories and carbs dramatically. (And with all the extra seasonings in it you can't even taste the difference. It's a perfect substitution!)


Come with us as we dig deeper into the topic of nutrition and as we commit to eating fresher and being healthier!

Below is my "lite" version of Eating Well's Tex Mex Salad recipe...


Lite Tex Mex Salad
Recipe courtesy Lori Tisdale

Ingredients
½ cup prepared salsa
3 tablespoons Fage 0% Greek Yogurt
1 teaspoon canola oil
1 small onion, diced
3 cloves garlic, minced
10 ounces ground turkey
1 large plum tomato, diced
1 can kidney beans, rinsed
2 teaspoons ground cumin, divided
2 teaspoons chili powder, divided
Pinch cayenne pepper
2 tablespoons cilantro, chopped
Kosher salt
4 cups shredded romaine lettuce
¼ cup pepper jack cheese, shredded

Instructions
Make the lite southwest dressing first. Compbine Fage yogurt, 1 tsp ground cumin, 1 tsp chili powder, pinch of cayenne pepper and kosher salt. Whisk together until combined. Add salsa to yogurt mixture and stir well. Set aside.

Heat oil in large nonstick skillet over medium heat. Add onion and pinch of salt and cook, stirring often, until onions start to turn translucent. Add garlic and cook for an additional minute or so, stirring often. Add ground meat and cook until cooked through, 4 to 6 minutes. Add kidney beans, cumin, chili powder and a pinch of salt. Stir well, lower heat and place lid on skillet. Allow to sit for about 15 minutes to ensure the beans get cooked. Remove lid, add tomato and cook for a few more minutes, until the tomato begins to break down (about 2 minutes). Remove from the heat, stir in cilantro and 2 tablespoons of the salsa mixture.

In a large bowl add lettuce and remaining salsa mixture – toss until all lettuce pieces are coated with salsa. Divide lettuce among two plates; top with the cooked meat/bean mixture, shredded cheese and a few crumbled tortilla chips.


enjoy your time in the kitchen...
Sunday, June 12, 2011

Herbs: Cilantro, the experiment


If you've ever attempted to grow cilantro you might understand when I say that it's TRICKY! But I so badly want to grow it... because I'm tired of buying a new bundle every week. I use it so often... why can't I just figure out how to grow it?!

I had given up at one point due to failing on more than one occasion. This time I set my mind to researching the known issues further, asking other herb lovers (and by "herb lovers" I mean, they like to GROW and UTILIZE herbs... not smoke them) and doing an experiment of my own.

I had learned a lot in the meantime ... how difficult can this be?! So, I purchased two cilantro plants and found similar size containers to put them in.


What I learned...
Cilantro does not like heat but it likes a lot of the cool morning sun.
The soil must stay moist and have good drainage.
The plant should be trimmed regularly to promote new growth.
Snails/slugs LOVE cilantro and can eat through a plant within about 24 hours.
Each plant will potentially harvest two or three bundles of clippings before bolting.
Depending on how much cilantro being use, plant more seed every 2-3 weeks to ensure continual availability.
Cilantro grows very fast!
When the plant bolts, you can use the coriander seeds to replant or save them and use them as a spice.


Sample #1
Grow INDOORS next to window that gets that most morning sun but in a room that does not get hot. Keep soil moist and trim regularly. (And since I don't have snails in my home I think this is the example that will work the best.)

Sample #2
Grow OUTDOORS, where it gets morning sun, but is in the shade during the hottest part of the day. Keep soil moist and trim regularly. (Watch daily for snails/slugs.)


Can you guess which sample is which?!


As you can see the sample on the right is not well at all. I had noticed quite a bit of dead sprigs on it and trimmed it back (it's first trimming). And gave it more water. It has not bounced back.

The plant on the left is Sample 2, which is the winner... the OUTDOOR sample is thriving!


Would you like to know more about it's current growing conditions?
The plant gets streaming morning light, but partly shaded direct sun for about an hour in the morning. It sits on a tall ledge, under the over-hang, by my front door. I keep the soil moist, by adding about a cup of water to the soil every other day. A good portion of that water drains out the bottom, but it holds on to what it needs.

I will be trimming a good portion of this back today. Stay tuned for future pictures of how long this planting lasts and what it looks like...


enjoy your time in the kitchen (and the garden)...

Herbs: why they "bolt"


Have you ever had something like this shooting straight up from your herbs? (The above shot is a picture of a bolting sprig on my dill plant.)


I recently discovered this in my italian flat-leaf parsley (below) and started researching what that meant. Afterall, I didn't think parsley had flowers!


What I discovered is that this is called " bolting ". What I understand about bolting is that this is the plant's natural defense mechanism to stay alive. When the growing conditions change (ground temperature rises, the plant is growing in extreme heat conditions, etc) the plant's natural defense is to move on to the next stage of life... so it bolts. Literally! It sends this shoot straight up in the air, producing these interesting looking pods and goes to seed. It's so concerned about the next generation (seed) that it does what it can, while it can, to save itself.

Here's one thing to realize... once it bolts there isn't much you can do about it. The plant's energy is all re-directed to this shoot of the plant that the rest of it loses it's flavor and often times becomes extra "woody" and/or dies off.

We can often times slow down the bolting process by keeping the plant trimmed back (even if we aren't utilizing all of the plant it needs to be trimmed to promote new growth). Routine trimming also keeps the plant fuller looking.

And the second thing to realize? Almost all herbs (and some green vegetables, like lettuce of broccoli) will eventually bolt. That said, be prepared to harvest the items immediately, take advantage of the seed production and start a new pot from seed and/or purchase a new plant.

It's the cycle of life... and for us gardeners it's sad, but it's ok. We'll be ok.


(sniff, sniff)


enjoy your time in the kitchen (and your garden) ...

LinkWithin

Related Posts with Thumbnails